Smile Gallery
Shu Dental Lab Transformations

BEFORE
AFTER
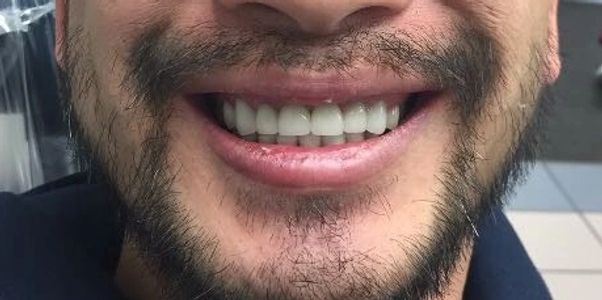
Crowns Installed
E.S.I.T® Process

Step 1. Remove healing cap and place scan body in patients mouth.

Step 2. Alignment of the abutment is done digitally.
Step 3. Abutment is digitally designed from 3D printed model designed with soft tissue
Step 4. A printed model is made along with custom abutment
Step 5. Finished crown of your choice is fabricated and fitted to custom abutment

Step 6. Insert finished abutment and crown into the patients mouth
Crown and Bridge

Zirconia Crown and Bridge screwed into gums

Bridge implant, abutment shown

Bridge implant, abutment gets drilled in, seen on underside of teeth

Patient teeth is prepped (shaved) for crowns to be placed on top
ALL ON FOUR Implant
Full upper Zirconia (porcelain) denture

Four screws are inserted through the denture into the gums

The screws go through the holes in the underside of the denture

Denture with resin model of gums with four screw placements

Denture is screwed onto model of gums

Model of denture screwed into all four placements in gums
Hader bar All on four

Removable full denture on hader bar

Hader bar is screwed into gums in four places.
Denture is snapped onto bar with metal clips